Make a Bench Vise for Woodworking
- What You Need. About 16 linear feet of one by six hardwood (actual measurements ¾” x 5½”). ...
- Front Jaw. Cut two 32” long pieces from the one by six board. ...
- Rear Jaw. The rear jaw is L-shaped. The short ‘lip’ is used to clamp the rear jaw to your workbench. ...
- Drill Holes for the Hex Bolts. Drill two ½” holes through the front jaw 3” from the short edge and 2 ¼” from the top edge. ...
- Make Handles. You could stop right here and use ½” hex bolts and washers to complete the vise and open/close it with a wrench.
- Use Your Bench Vise. I did not use any finish on the bench vise or handles. I plan to sand it down if it needs cleaning. ...

How to install a woodworking bench vise?
- Things to know:
- You have to space the vise and dogholes around the bench legs and any facevise mounting hardware.
- You also can hold stock vertically between the movable jaw and the bench.
- A quick release, available on some tail vises, speeds up big changes in vise position. ...
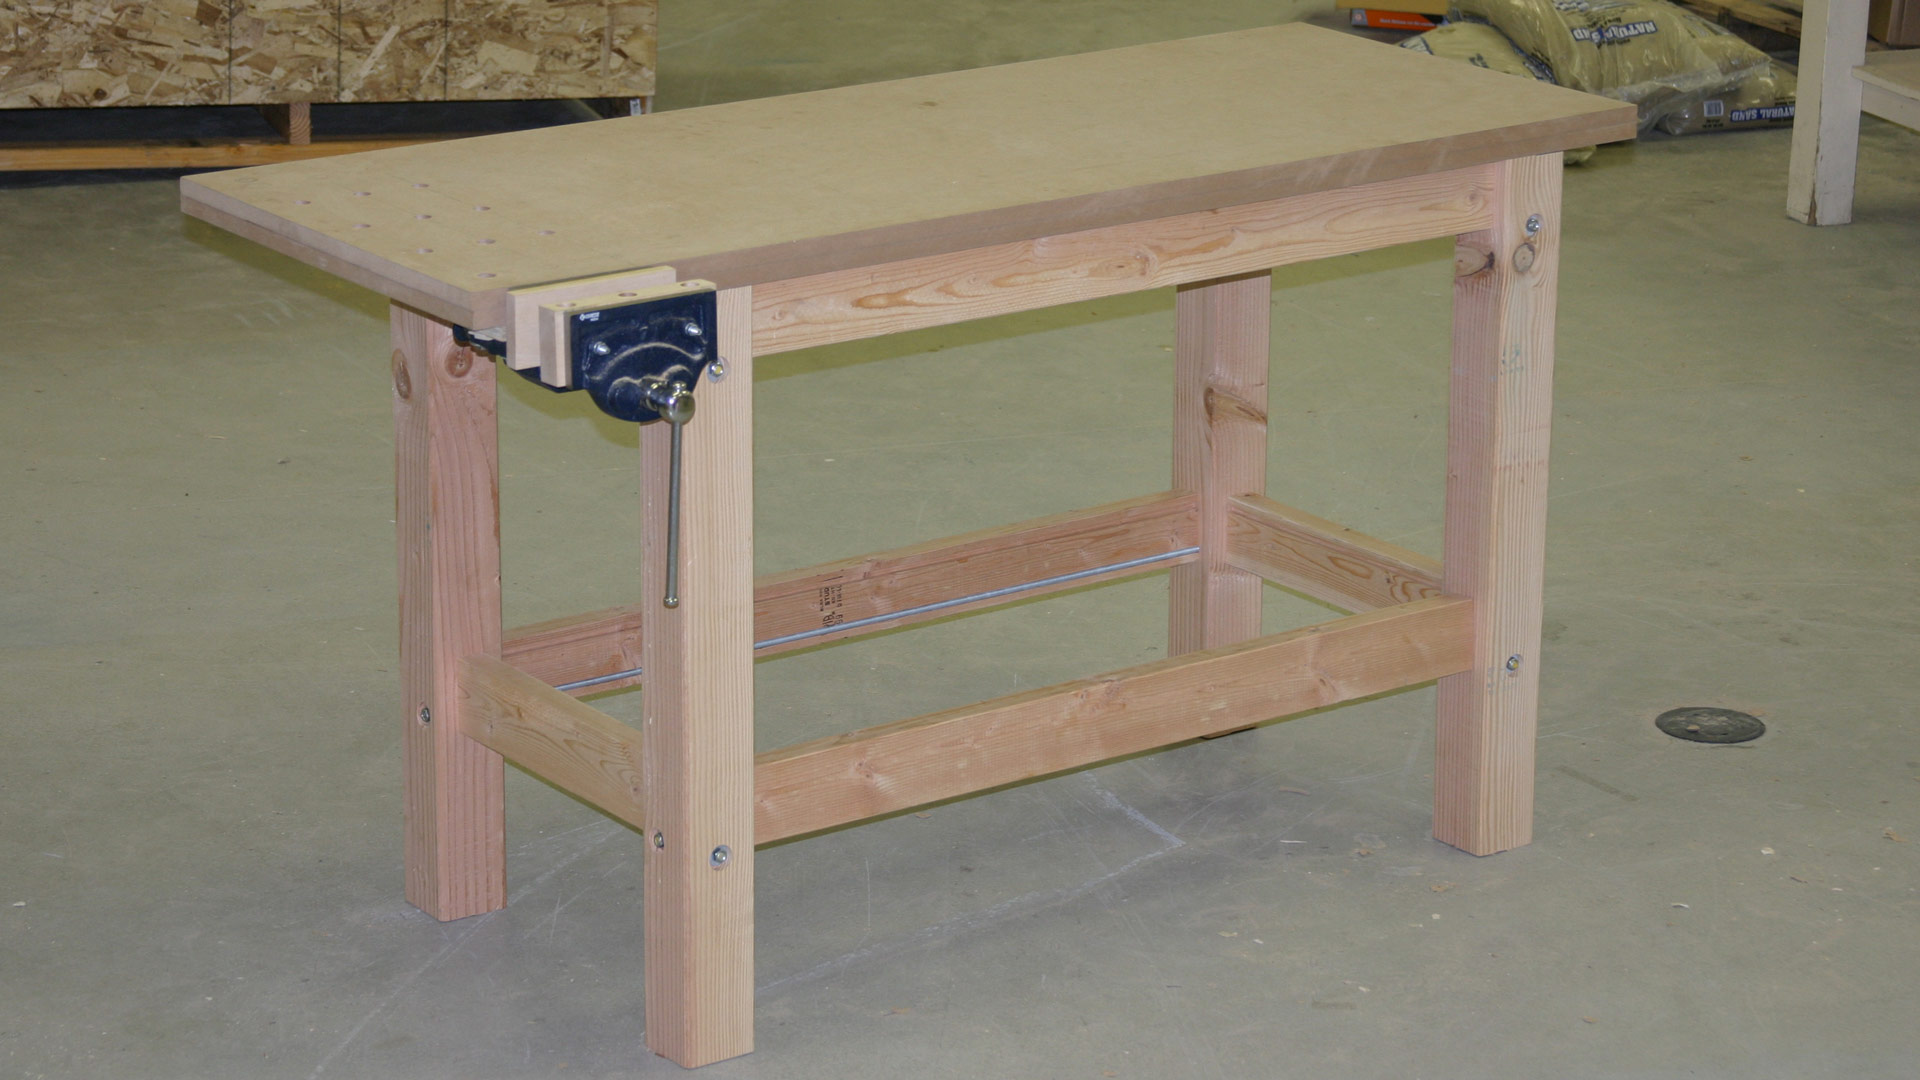
How to build a workbench simple DIY woodworking project?
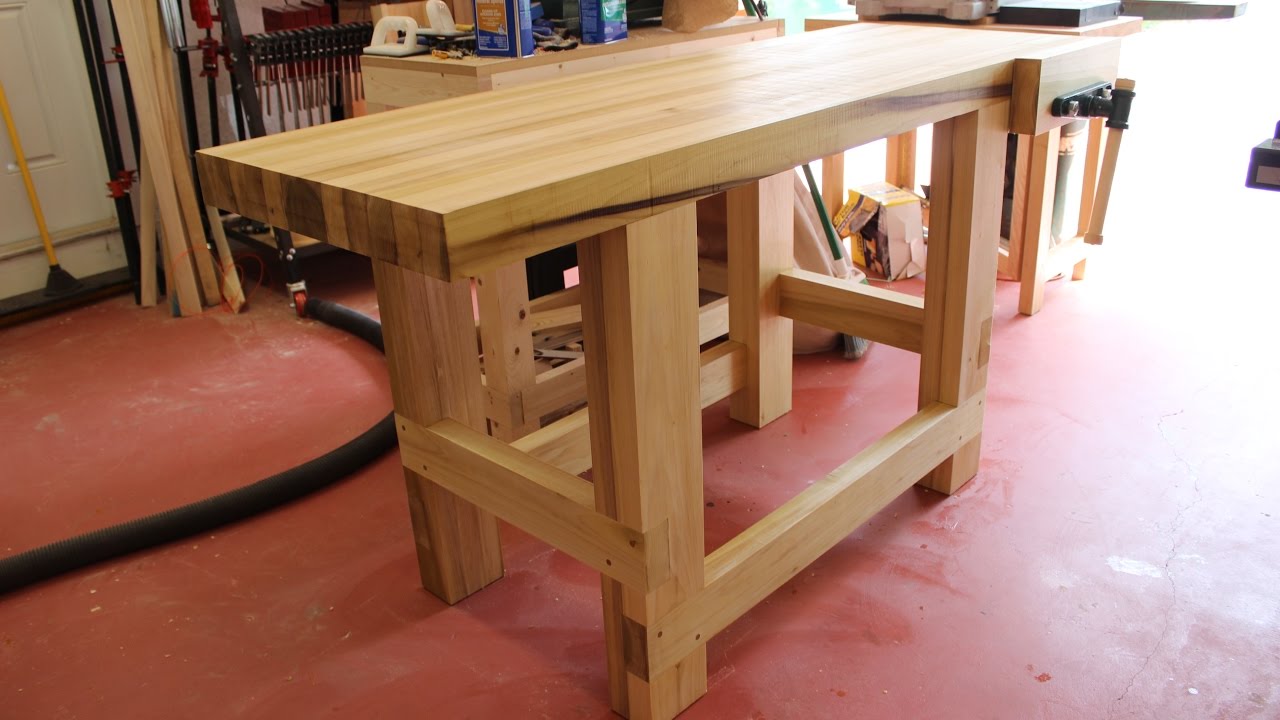
How to Build your own DIY Workbench
- DIY Workbench Tools Needed. Orbital Sander– Ryobi makes a nice one.
- DIY Workbench Supplies Needed. This simple DIY Workbench can be made for about $175 in materials cost. ...
- Cut All of the Wood Pieces. ...
- Start Assembly, Making the Top First. ...
- Assemble the Bottom. ...
- Cut the Plywood and Attach. ...
- Stain and Finish the Workbench. ...
- Get to Work! ...
How to design and build the perfect Workbench?
- You need 4 - 4 foot lengths of 2x4s
- Set up the sled so that it cuts between a 1/16 and 1/8 of an inch more than 3 1/2 inches
- Measure the height of the mortise (2.436 inches)
- Measure the height of the 2x4 (3.481 inches)
- Subtract the smaller from the larger and divide by two (0.5225 inches)
How to make a wood vise?
Make a Bench Vise for Woodworking
- What You Need. About 16 linear feet of one by six hardwood (actual measurements ¾” x 5½”). ...
- Front Jaw. Cut two 32” long pieces from the one by six board. ...
- Rear Jaw. The rear jaw is L-shaped. ...
- Drill Holes for the Hex Bolts. Drill two ½” holes through the front jaw 3” from the short edge and 2 ¼” from the top edge. ...
- Make Handles. ...
- Use Your Bench Vise. ...
What can I use instead of a bench vise?
Cut out this bird's mouth shape using whatever you have: a back saw, jig saw, coping saw, band saw. Set up the long piece of wood as a stop against the end your worksurface. If you're right handed, that's the left side; if you're a leftie, then the right side. Clamp or screw it in place.
What kind of wood is used for bench vices?
You can use plywood, a good grade, or solid wood, even pine, if that's what you have, to line the jaws of your vise. In this case I've chosen sapele, an african hardwood with perfect hardness and compression for this work. I've used it before and it's one of the best.
How do you make a carpenters bench vice?
0:426:39DIY Woodworking Bench Vise - Quick and Easy Shop Project - YouTubeYouTubeStart of suggested clipEnd of suggested clipOver at the table saw i cut a piece of 1 inch thick ash to 5 inches wide for the face of the vise.MoreOver at the table saw i cut a piece of 1 inch thick ash to 5 inches wide for the face of the vise.
How thick should wood be for vise?
I would recommend at least one inch of hardwood onm the outside face of the chop. The inside face need not be as thick since it will not be compressed during tightening, so about 1/2" should do it.
What material are vise jaws made of?
Metal vise jaws are usually made of aluminum or soft steel. They are sometimes heat treated, anodized, or coated with black oxide. Plastic vise jaws are usually made of polyurethane (PU), a broad category of polymers that resists abrasion and solvents to varying degrees.
How do you protect wood in a vise?
0:151:08How to Prevent a Workshop Vice from Damaging Wood - YouTubeYouTubeStart of suggested clipEnd of suggested clipJust put it in place crank. It down I matter how much pressure you put on this. You're going to haveMoreJust put it in place crank. It down I matter how much pressure you put on this. You're going to have those pads in place.
How do you make a homemade wooden vise?
0:207:17How to make a Workbench Vise ( DIY MOXON VISE ) - YouTubeYouTubeStart of suggested clipEnd of suggested clipOn one side of the jaw. I need to round out a dado slab. This will need to be equal to the thicknessMoreOn one side of the jaw. I need to round out a dado slab. This will need to be equal to the thickness of the plywood that will be used for the base the prow what I'm using is a bit thinner than 3/4.
How do I make a quick release vise?
0:3017:20Homemade Quick Release Vice - YouTubeYouTubeStart of suggested clipEnd of suggested clipAnd I've just cut into lengths and I've cut them at 500 mil. So my next job is to cut three holesMoreAnd I've just cut into lengths and I've cut them at 500 mil. So my next job is to cut three holes one either side for my guide rails where I'm using this tubing here off an old trampoline.
How do you make a drill press vise?
3:539:44Homemade Drill Press Vise - YouTubeYouTubeStart of suggested clipEnd of suggested clipI cut the pins which are just wooden dowels down to their final size and tested the fit of theMoreI cut the pins which are just wooden dowels down to their final size and tested the fit of the backing on the base. After that I started laying out the rest of the components. I decided on pre
What height should a workbench be?
38″ – 39″ (97cm – 99cm) makes a practical, tall workbench height. A tall workbench is good for detailed work, cutting joinery, and for power tool use. 34″ – 36″ (86cm – 91cm) tend to be the most common workbench height for woodworking.
What is the best top for a workbench?
The Best plywood's for workbench tops The best one to use is Baltic Birch or marine grade plywood. You want to use 3/4 inch or thicker sheets of plywood for stability and strength of your work surface.
Is Birch a good wood for a workbench?
These are heavy-duty, solid European Birch tops which are perfect for use in your shop or home. They can be the basis for making your own custom workbench or a butcher block counter on an island or a coffee table. Birch is a hard-wearing durable material for any top and gives a natural look to any project.
What vise does Paul Sellers use?
Paul has also recommends the Eclipse 9″ Quick Release vise as it is more readily available and seems to hold up well.
What are the parts of bench vice?
2.2.1 Bench vice It essentially consists of a cast steel body, a movable jaw, a fixed jaw, both made of cast steel, a handle, a square threaded screw and a nut all made of mild steel.
How do you make a shoulder vice?
9:1613:44Part 4 Assembling the Shoulder Vise Sam Angelo WyomingwoodturnerYouTubeStart of suggested clipEnd of suggested clipBefore I glue it up this is the walnut spacer block that I'm going to have right in the corner thereMoreBefore I glue it up this is the walnut spacer block that I'm going to have right in the corner there and I have a groove milled into that to allow for that threaded bolt.
Do I need a woodworking vise?
The sturdy engineer's vise is essential for anyone who works with metal—which includes almost every woodworker, by the way, when it comes to sharpening, and dealing with all sorts of hardware and other components. Each vise has some specialized advantages, but you'll have to make the call.
Step 1: Preparing for the Linear Bearing
I got a bit of a head-start on the vise installation while I was still working on the bench by drilling a few holes for the vise screw and linear bearing that I will be using in the leg.
Step 2: Installing the Linear Bearing
Next, I double checked that the linear bearing was perpendicular to the front face of the leg by inserting the linear rod and made a few slight adjustments with the Forstner bit in my cordless drill before pre-drilling and screwing it to the leg.
Step 3: Mounting the Vise Screw Collar
For this leg vise, I decided to go with a Yost 18" Vise Screw. It's plenty strong, relatively cheap, and turns easily.
Step 4: Painting the Vise Hardware
While the vise hardware is great, it was a bit too blue for me. I first cleaned the paint with some mineral spirits and then masked off the screw with a bit of string and a piece of dowel. After a couple of coats of flat black spray paint, the hardware looked great and matched the hardware that I planned on using for the end vise.
Step 5: Gluing Up the Leg Chop
Next, it was time to start on the chop. I started by rough-cutting a 2x8 into two pieces at the miter saw. I then ran one face from each piece through the jointer and then glued the two pieces together to form one thick piece.
Step 6: Surfacing the Chop
Once the glue dried, I took it back over to the jointer to flatten one face and one edge before surfacing the other face at the planer. I then took it back over to the miter saw to cut it to final length before ripping it to final width at the table saw.
Step 7: Beveling and Trimming the Chop
To make cutting pieces held in the vise easier, I went ahead and cut a bevel across the top of the chop before heading over to the drill press to make it look slightly fancier and lighten it just a bit. To do that, I used a large Forstner bit to cut out a curve about a foot from the top on each side.
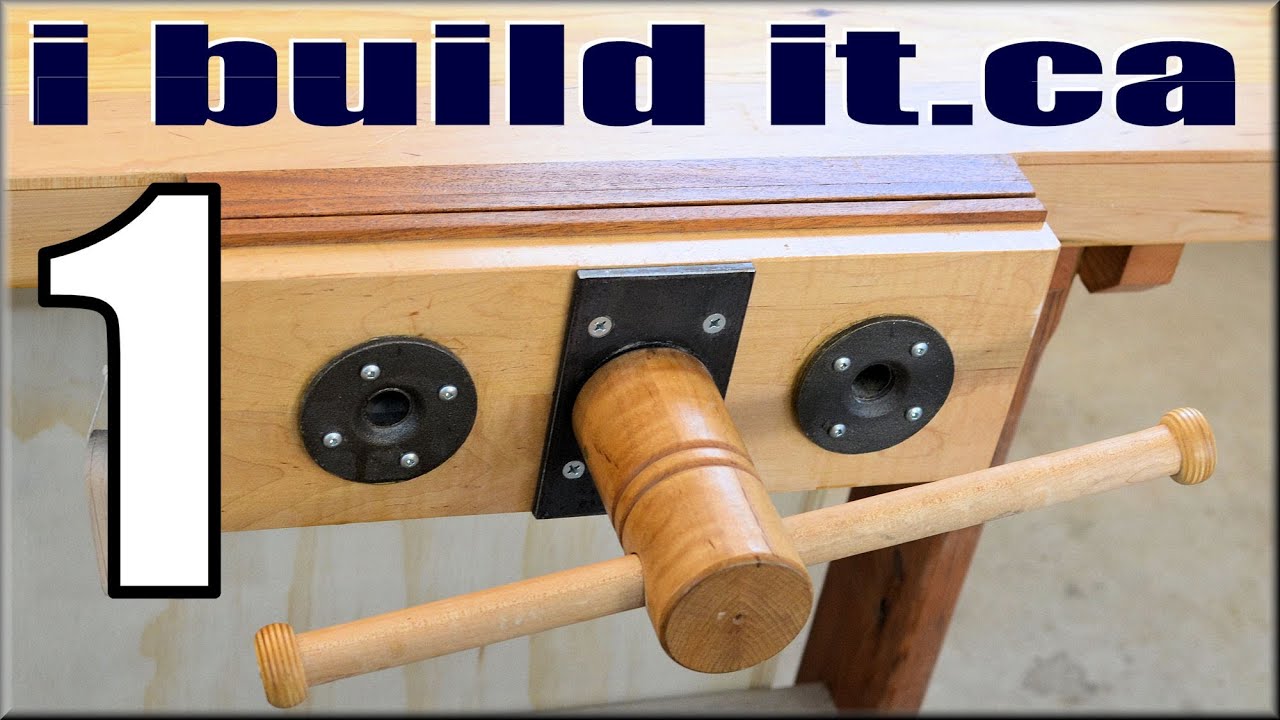
Step 1: Welding a Nut to a Base
I want to use a M16 threaded rod for the linear movement. Therefore I need a nut or something threaded to interact with the rod. I decided to weld a M16 nut to a flat plate connector. The flat plate connecter has already some holes to fix this part to the workbench. Unfortunately I don't have a welder so I asked my dad to do this job for me.
Step 2: Welding a T-Piece, a Washer and the Rod
I want to use a T-piece pipe to hold the threaded rod and a wooden rod later. The tee has two 3/4" ends and one 1/2" end.
Step 3: First Test Run
Both parts are finished. Let's try if everything fits together. Looks very good. The difficult part is done. Now comes some woodworking.
Step 4: The Moveable Jaw
So what we need next is a moveable jaw for the vise. My dimensions are 40cm by 15cm, but you can adjust them to your needs. I use scrap wood I have laying around. I would use some kind of hard wood for the jaws, but unfortunately I don't have enough, but I use a little trick.
Step 5: Mounting the Rod and the Support Pipes to the Jaw
I use two 5/8" copper pipes to support the rod and to keep the jaw from rotating. They have a length of 50cm. You can adjust the length to your needs.
Step 6: Drilling the Holes to the Workbench Jaw
This time I need three holes which go right through the workbench. I use my rack to get everything in a right angle. I finish the surface with a sander.
Step 7: Building the Flange
Remember the washer, which we welded to the T-piece? Now you'll see its purpose. I need some kind of flange, which will connect the jaw to the rod, but still loose enough to allow rotation. This allows the jaw to move with the rod while opening the vise.