How to Properly Use a Pipe Vise
- Preparation Find a flat and level surface on which to place your pipe vice. ...
- Opening the Pipe Vise You will see a T-handle at the top. ...
- Insert the Pipe Slide the pipe into the slot in the middle, setting it on the curved base. ...
- Secure the Pipe
Full Answer
How to make a pipe clamp bench vise?
Pipe Clamp Bench Vise 1 Measure for Mounting. I recently built a workbench for my miter saw and left space for this vise. ... 2 Cut to Length. I trimmed the ends of both jaws, and then trimmed one board to 26". 3 Align for Pipe Holes and Drill. ... 4 Mount Pipe Clamp to Jaws. ... 5 Mount the Fixed Jaw to the Bench. ... 6 All Done! ...
How do you use a vise safely?
When using a striking tool or a power tool on a work piece held by a vise, it is advisable to wear a face shield or safety goggles. Check that the vise is attached securely. There must be bolts in all the holes in the base of the vise. There must be lock washers under the nuts.
How do you thread a pipe with a table vise?
Place the pipe in the vise so the end you want to thread is sticking out, then turn the handle back clockwise to tighten it and secure it in place. [1] Note that you can use either a regular table vise or a pipe vise that is specially designed for holding piping in place.
How do you mount a vise on a workbench?
The vise should be mounted such that its stationary jaw projects a little beyond the edge of the workbench. This makes it easy to clamp a long work piece in the vise without the edge of the workbench interfering. Before attempting to clamp a work piece in a vise, check the jaws for damage or cracks.
How does a pipe vise work?
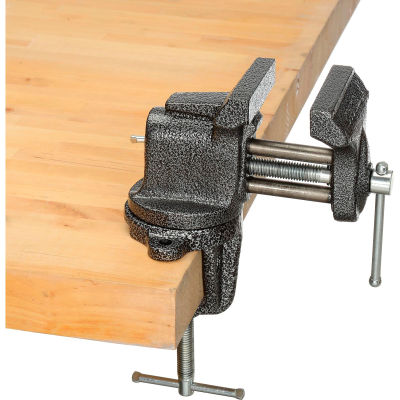
0:100:57Pipe Vise - YouTubeYouTubeStart of suggested clipEnd of suggested clipThe pipe vise is an economical choice for clamping parts to your bench. The mounted base has theMoreThe pipe vise is an economical choice for clamping parts to your bench. The mounted base has the clutch plates that grab the standard three-quarter inch pipe.
How do you use a portable pipe vise?
0:295:05Portable Pipe Vise / Foot Vise - YouTubeYouTubeStart of suggested clipEnd of suggested clipSo far hand tight and then to tighten it typically I would use my wrench. As a means of holding theMoreSo far hand tight and then to tighten it typically I would use my wrench. As a means of holding the pipe. Still. This is the good old plumber's trick here. You get it in there.
How do you hold a pipe in a vise?
Hold piping and soft metal materials in a vice clamp Simply place soft plastic Wobble Wedges on either side of your material. Use the tapered structure to help secure round piping or any material with curvature.
What tool is pipe vise?
A pipe vise can be used when threading pipes. A pipe vise is an apparatus which enables a pipe to be held tightly. Complete with two half-circle jaws, the pipe vise can be tightened to grip a pipe and hold it securely while it is being worked on.
What is a portable pipe vise?
Built for rugged jobsite use, the RIDGID 16703 Portable TRISTAND Chain Vise securely holds pipe in place for threading or cutting. Designed for easy portability and set-up, the pipe vise features integral legs and tray that fold in, along with a quick-grab self-locking latch and integrated carrying handle.
How do you use a tri stand?
1:111:46How To Use RIDGID® Portable Tristand Vises - YouTubeYouTubeStart of suggested clipEnd of suggested clipDown on the handle with one hand and pull on one of the three legs to open the Tri stand continueMoreDown on the handle with one hand and pull on one of the three legs to open the Tri stand continue pushing down until the legs lock into place for transportation.
What is pipe reamer?
Definition of pipe reamer : a fluted conical tool for beveling or removing burrs from pipe ends.
What is yoke vise?
Yoke vises are made of ductile or malleable iron and have hardened, high carbon steel jaws for toughness and long life. These yoke vises easily convert from right- to left-hand operation and back, making it simple to work around obstructions or to accommodate right- or left-hand user preference.
What is leg vice?
The leg vise can be visualized as a giant wooden hand screw clamp placed vertically . This form of vise probably evolved from the blacksmith's iron post vise. Leg vises typically use the left front leg of the bench as the rear jaw of the vise.
What do you use a vice for?
A vice is a tool used to hold objects securely while they are worked on. A vice can be used to hold large and heavy objects as its jaws have a grip that can exert considerable pressure.
When should you use vise caps?
When should you use vise caps? You should use vise caps to prevent damage when mounting parts in a vise.
What type of vise do I need?
For general household DIY, a 4- to 5-inch vise is large enough to handle most tasks. (This measurement is the length of the jaws from end to end and is maximum amount of contact your vise has with the workpiece.)
What is yoke vise?
Yoke vises are made of ductile or malleable iron and have hardened, high carbon steel jaws for toughness and long life. These yoke vises easily convert from right- to left-hand operation and back, making it simple to work around obstructions or to accommodate right- or left-hand user preference.
What is hand vise?
Definition of hand vise : a small clamp or vise on a handle designed for holding small objects while they are being worked usually by hand.
What is leg vice?
The leg vise can be visualized as a giant wooden hand screw clamp placed vertically . This form of vise probably evolved from the blacksmith's iron post vise. Leg vises typically use the left front leg of the bench as the rear jaw of the vise.
How do you make a bench stand vise?
1:108:06How to Make a Vise Stand From Scrap Metal - YouTubeYouTubeStart of suggested clipEnd of suggested clipI'm just getting some rough locations. So when i go to weld it'll be easier to. Align i think i cutMoreI'm just getting some rough locations. So when i go to weld it'll be easier to. Align i think i cut this post to make the top of vice finish out at 36 inches i did this to match my other extra hand.
Step 1: Measure for Mounting
I recently built a workbench for my miter saw and left space for this vise. I measured the opening and it came to just slightly over 26".
Step 3: Align for Pipe Holes and Drill
I lined up where I wanted to drill and used a square to draw lines across both boards. I then measured down from the top to align vertically. Some how at this point I messed up one of the marks as I would later discover after I drilled the holes and they didn't line up. Oops.
Step 4: Mount Pipe Clamp to Jaws
Drill holes through the metal of the pipe clamp so you can mount them on the jaws. I used washer-head screws. Pay attention to how you affix the clamp to the wood jaws. You have to make sure that the clamp parts clear the bench.
Step 5: Mount the Fixed Jaw to the Bench
I used a mix of pocket holes and 2 1/2" drywall screws. I made sure the jaw was flush with the front of the bench. You can see here how I had to enlarge the holes after drilling them slightly off. It would have been easier if I had a drill press, but c'est la vie.
Step 6: All Done!
One the back jaw was mounted, you just slide the pipes in. Once the pipes are mounted and aligned, your vise is ready to go!
Step 1: Safety While Heating PVC
We love plastics for what they do for us, but plastic manufacture and decay tend to pollute the environment and negatively affect our health. Vinyl Chloride, one of the components of PVC, is carcinogenic. When it is locked up in the polymer, however, it is much safer to be around.
Step 2: Planning and Layout
I used a piece of paper to substitute for the PVC while I visualized how big a piece of plastic I needed. The height of a stack of four CD's was about how deep in the vise I wanted the pipe to rest. The plastic had to be long enough to allow that and wide enough to cover the vise jaws and leave some extra material for tabs to fold down later.
Step 3: Preparing the Vise
The plastic will be heat formed directly over the vise, with a piece of pipe in place to assure a pipe of that diameter will fit in it later. In order to work quickly when the time comes, making sure the pipe goes in only as deep as desired, a piece of wood is placed in the jaw area for the hot plastic to bottom out against.
Step 4: Cutting and Opening Up the PVC
If you ever need to cut a piece of pipe nice and square, wrap a piece of paper around the pipe and use the edge of the paper as a guide for marking the cut line. As you saw around the pipe, keep turning the pipe so you can make sure you stick to the line. Cut the pipe section down one side.
Step 5: First Heat Forming
After getting the material soft and pliable, force it into position in the vise jaws. Fold over what protrudes from the top and hold it down until it cools. The next step will be to fold down the tabs on the sides of the jaws. Pencil in where you need to cut and then make the saw cuts.
Step 6: Fold Down the Tabs
Heat the tabs with a propane torch and bend them over the jaws. I did them one at a time, heating them away from the vise and then putting the adapter in place on the jaws for bending the tabs down. Round of sharp corners when the plastic cools. I used snips and a file to round the corners.
Step 7: Drill a Hole for Hangin
I hang my adapters on nails near the vise for easy access when I need them. Hanging things is a good way to keep things organized and visible.
What to use to support a vise?
If the work piece is extra-long, it may be necessary to support the end with an adjustable stand, a box or a sawhorse. This will remove the extra strain from the vise.
How should a vise be mounted?
The vise should be mounted such that its stationary jaw projects a little beyond the edge of the workbench. This makes it easy to clamp a long work piece in the vise without the edge of the workbench interfering.
How to clamp a work piece in a vise?
Before attempting to clamp a work piece in a vise, check the jaws for damage or cracks. Select a vise that is large enough to hold the work piece without strain. When placing the work piece in the vise, position it such that the entire clamping surface of the jaw can support the work piece.
What is the jaw opening of a vise?
It also has an extra deep throat that gives more working room and its jaws opens wider. The two factors that define a vise are its jaw opening and its tensile strength. For example, a machinist vise may have a 12-inch jaw opening with a tensile strength of 60,000 psi. In most bench vises, you can replace the jaws.
Why are vises used?
This is because a vise usually holds a work piece or material in place, leaving both hands free to work on the material. To enable stability of the work piece, vises are usually mounted on firm supports such as workbenches. Vises are versatile tools useful for a wide variety of work.
How to check if a vise is secure?
Check that the vise is attached securely. There must be bolts in all the holes in the base of the vise. There must be lock washers under the nuts. Make sure the bots are properly tightened. Ensure that the workbench is firmly secured to its base.
Can you weld a vise to metal?
– Never weld the base of a vise to any metal such as the metal top of the workbench.
What are the advantages of using a vice?
One advantage of using this vice is that having fastened the job once, we can revolve the job in any direction for doing different operations like filing, chipping, etc. It saves time. This vice has been shown in the figure.
How many types of vices are there?
Vises: 15 Types of Vice - How to Use? [Picutures &PDF]
What is a cast iron vice made of?
The complete construction of this vice is made of cast iron. Both its jaws are made of tool steel. The spindle handle is made of mild steel. This vice is most widely used in a workshop.
Why is the spindle on a movable jaw fixed?
It is because of these dents that the grip of the job is very strong. When the jaw plate is damaged it can be replaced. The spindle is fitted opposite to the movable jaw, which is fixed with the help of a pin and a spring. This spindle sets in the threaded box-nut tightened in the fixed jaw.
What is the mechanical device used for holding jobs called?
The mechanical device used for holding jobs is called vice. Also, it can be said that a workshop is incomplete without a vice.
Is a V-shaped jaw a vice?
It is a very useful vice. In this vice under both the parallel Jaws “V” shaped jaws are also made. Thus, along with the flat job, round pipes and rods etc. can be easily held, It has been shown in Figure.
Can a hand vice be used as a bench vice?
The combination hand vice has been shown in Figure. It can be used both in the form of a small bench vice and hand vice. By holding its vice handle it can be used as a hand vice. A base clamp is provided with it. With this clamp, it can be fitted on the bench also. In this way, it functions as a small bench vice.
THE NEWEST ADDITION TO THE FAMILY
Gone are the days of busting out that bulky old 18" pipe wrench to break loose or tighten pipe sizes under 1". The Amigo XL offers the same power as a traditional 18" pipe wrench at a fraction of the size.
The Amigo XL (SW16-1)
Gone are the days of busting out that bulky old 18" pipe wrench to break loose or tighten pipe sizes under 1". The Amigo XL offers the same power as a traditional 18" pipe wrench at a fraction of the size.
How to thread a pipe in a vise?
Loosen the jaws of the vise by turning the handle counterclockwise just far enough to fit the pipe between them. Place the pipe in the vise so the end you want to thread is sticking out, then turn the handle back clockwise to tighten it and secure it in place.
How to lubricate a pipe?
Lubricate the end of the pipe with threading oil. Apply a generous squeeze or two of threading oil to the outside end of the pipe. This will lubricate it so it’s easier to put the die head on as well as lubricate the teeth of the die head, making it easier to cut the threads. Don’t worry about applying too much lubricant.
What is a die head for a ratcheting pipe?
Select a die head that is of the appropriate size for the pipe you want to add threads to. A die head is the part of the pipe threader that actually cuts the threads. Ratcheting pipe threaders typically come with die heads in a few different common diameters.
What is a ratcheting pipe threader?
A ratcheting pipe threader consists of a long ratcheting handle that holds a circular die head at one end, which is a ring with several sets of teeth inside of it that cut the threads. When you ratchet the handle, the die head spins onto the end of the pipe, cutting the threads as it goes on.
What is a ratcheting handle?
The ratcheting handle is the handle you use to move it around the end of the pipe to cut the threads in it. Tip: Most ratcheting pipe threaders can be used to thread pipes made out of different materials like galvanized metal, copper, or PVC. Lubricate the end of the pipe with threading oil.
How to seal a pipe thread?
Wrap Teflon tape clockwise around the threads at the end of the pipe. Seal the threads with 2-3 wraps of teflon tape before you attach any connectors or fittings. This will ensure a tight, well-sealed connection.
How to make a pipe length?
Cut and ream the pipe if you need to make it a different length. Use a pipe cutter or a hacksaw to cut the pipe to length. Insert a reamer in the cut end of the pipe and rotate it around to remove sharp burrs and smooth the end out.